Setting up Schemas for Forms
Setting up schemas for Forms in Dynamo
The following steps will guide you to define schema model in Dynamo and also add it to domain
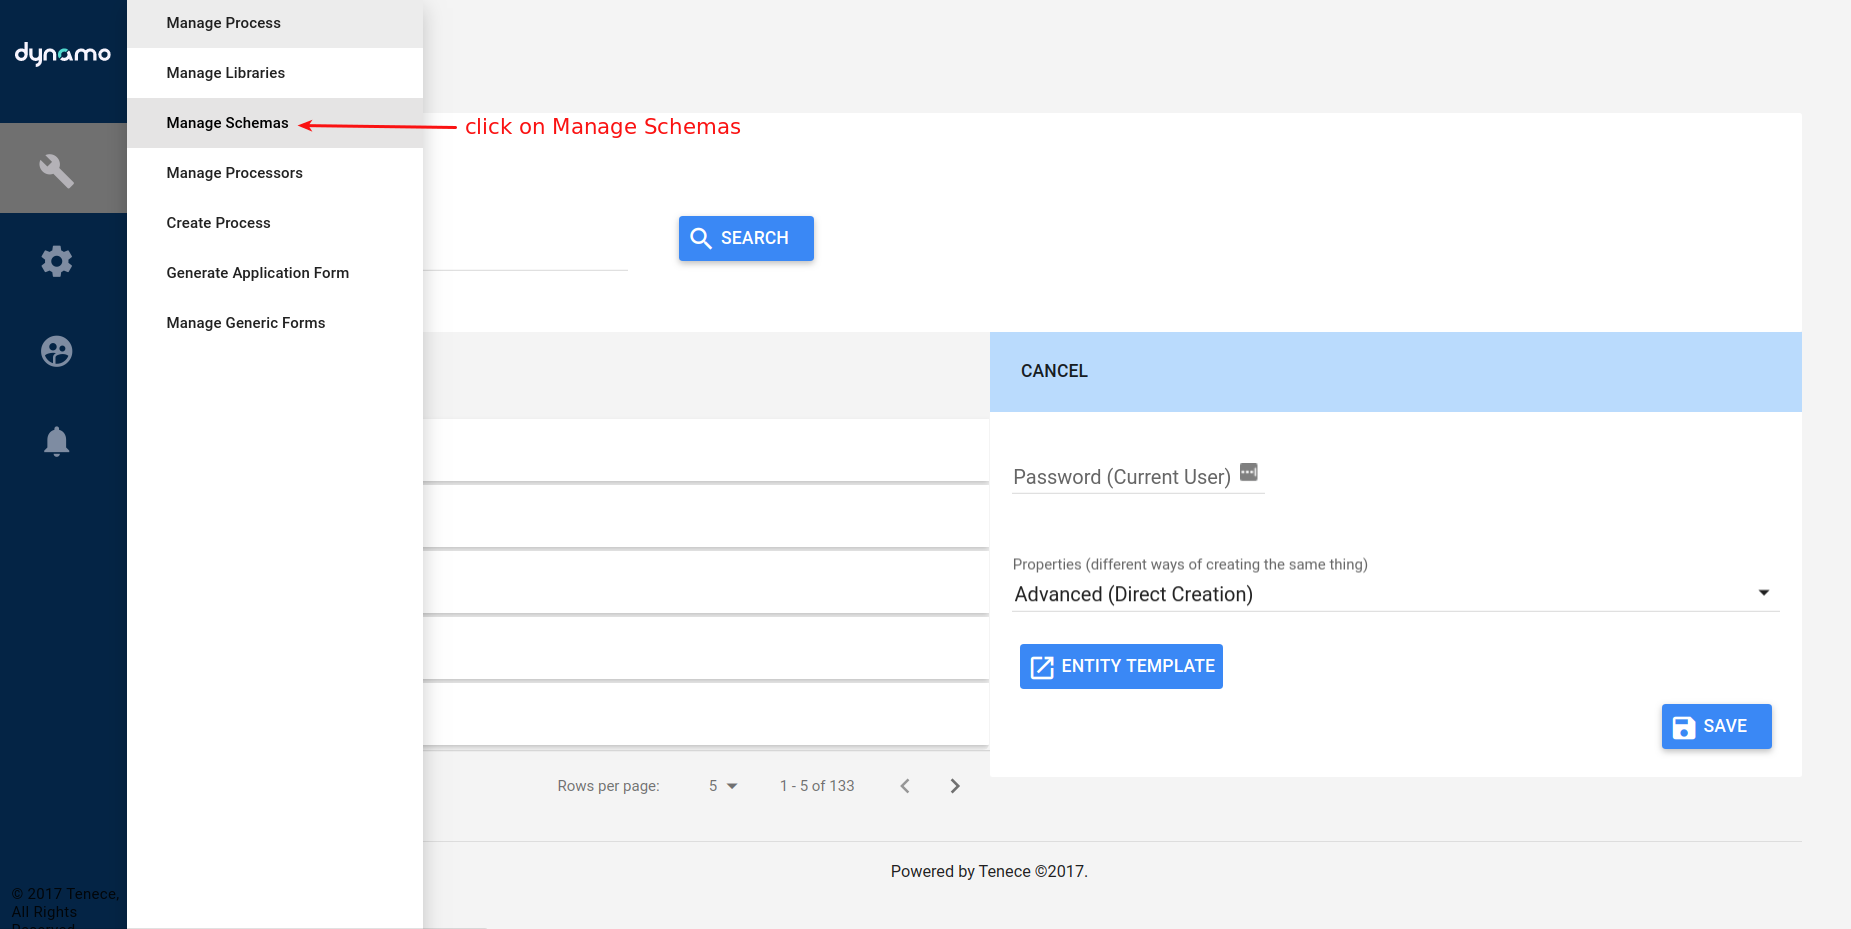
- Login to dynamo admin as an admin and click on Configuration at the left-hand side of the application then click on the Manage Schema.
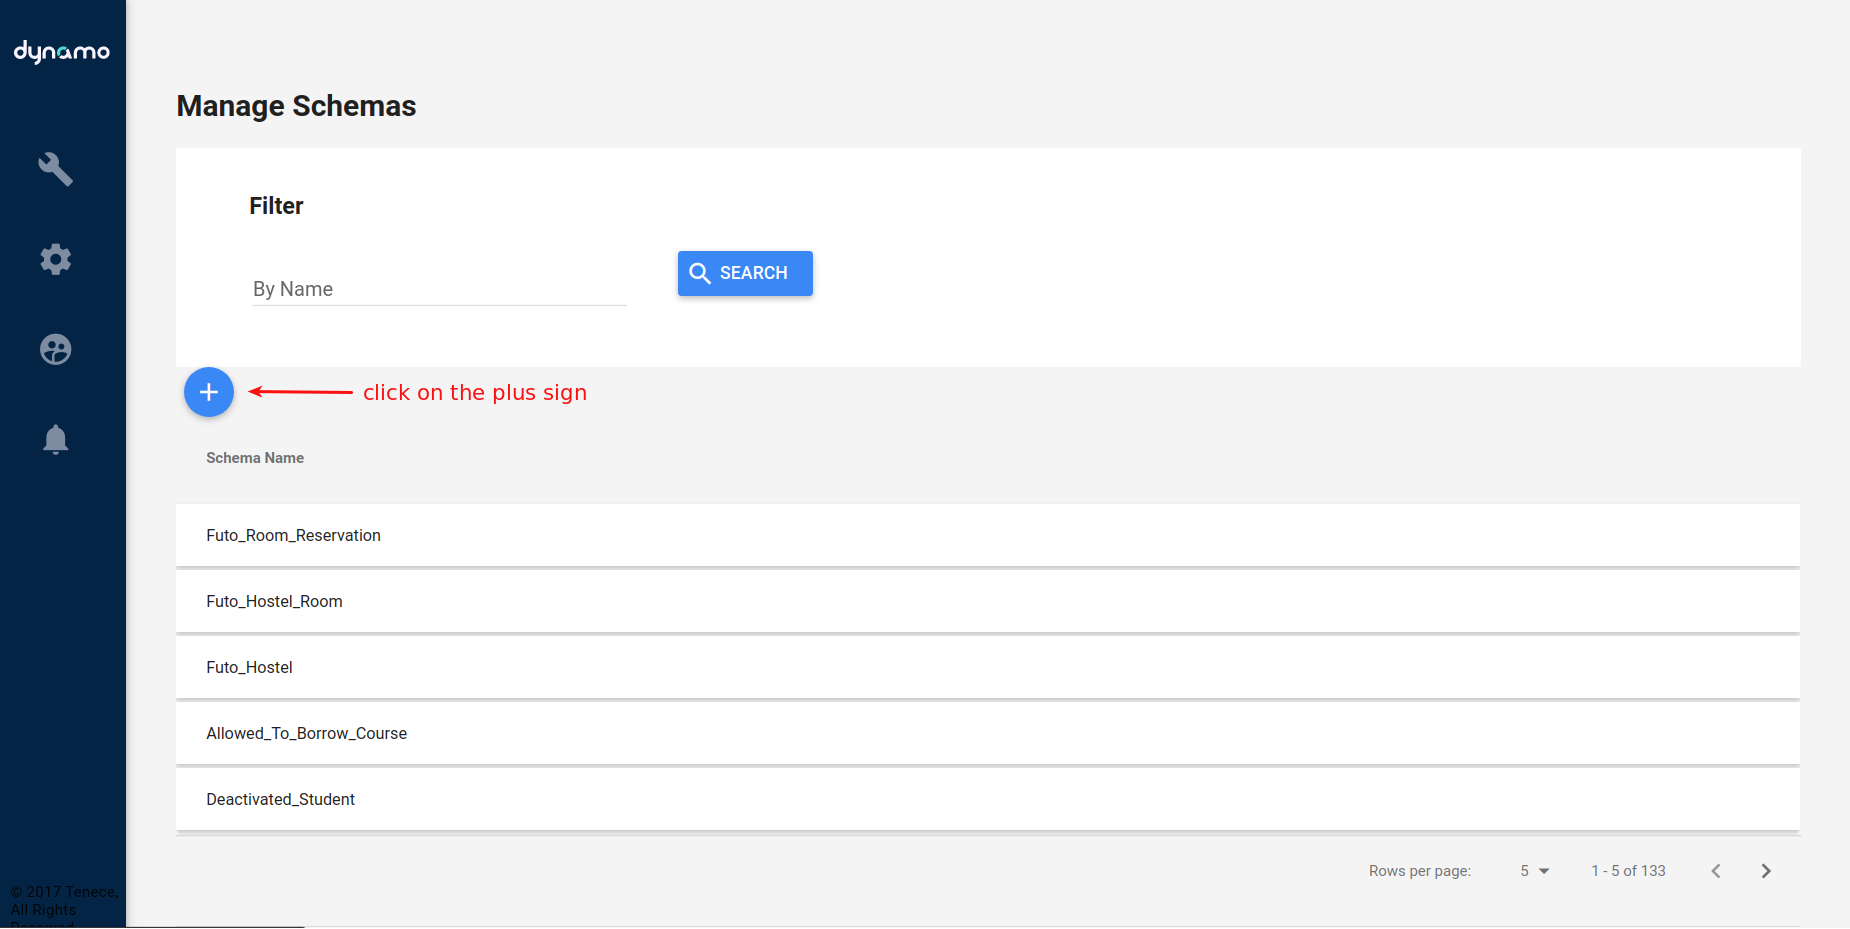
- Click on the plus sign at the middle right-hand side
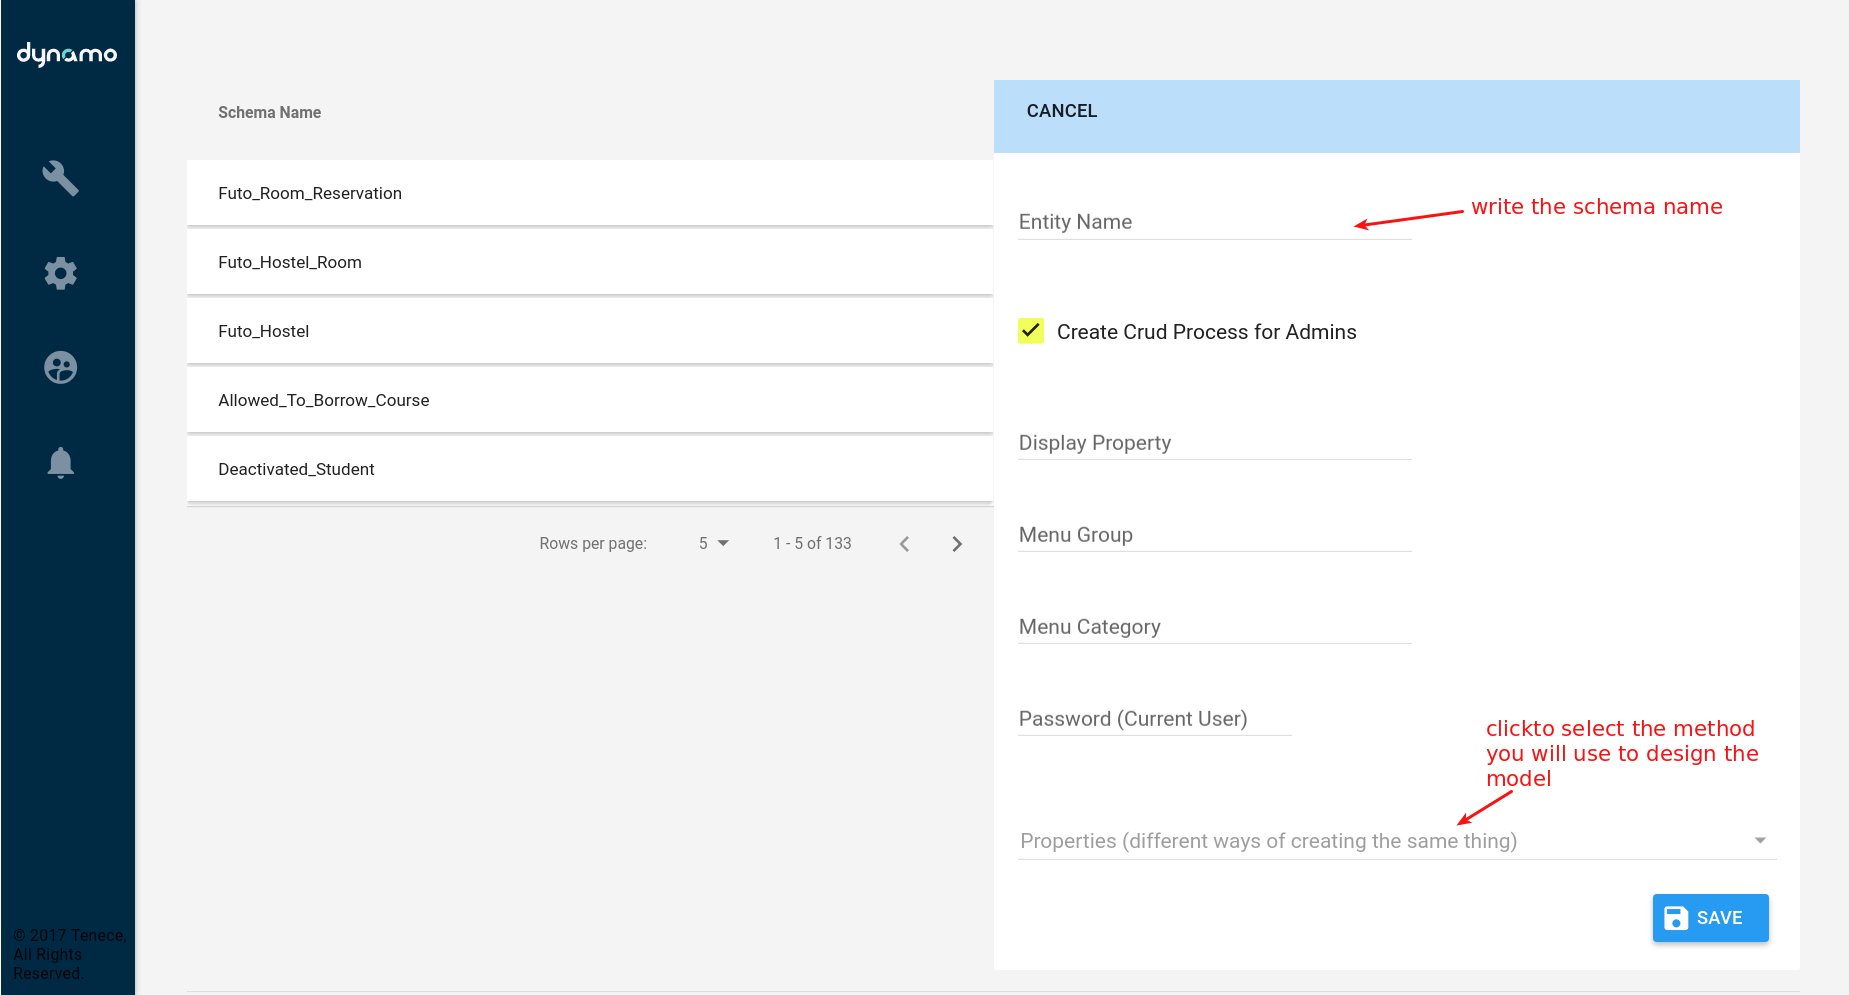
- In the panel that is displayed on the left side when you click on the plus sign. Write the name of the schema in the entity name field and select the method you will use to build the schema model either by Designer or Advanced method from the properties field.
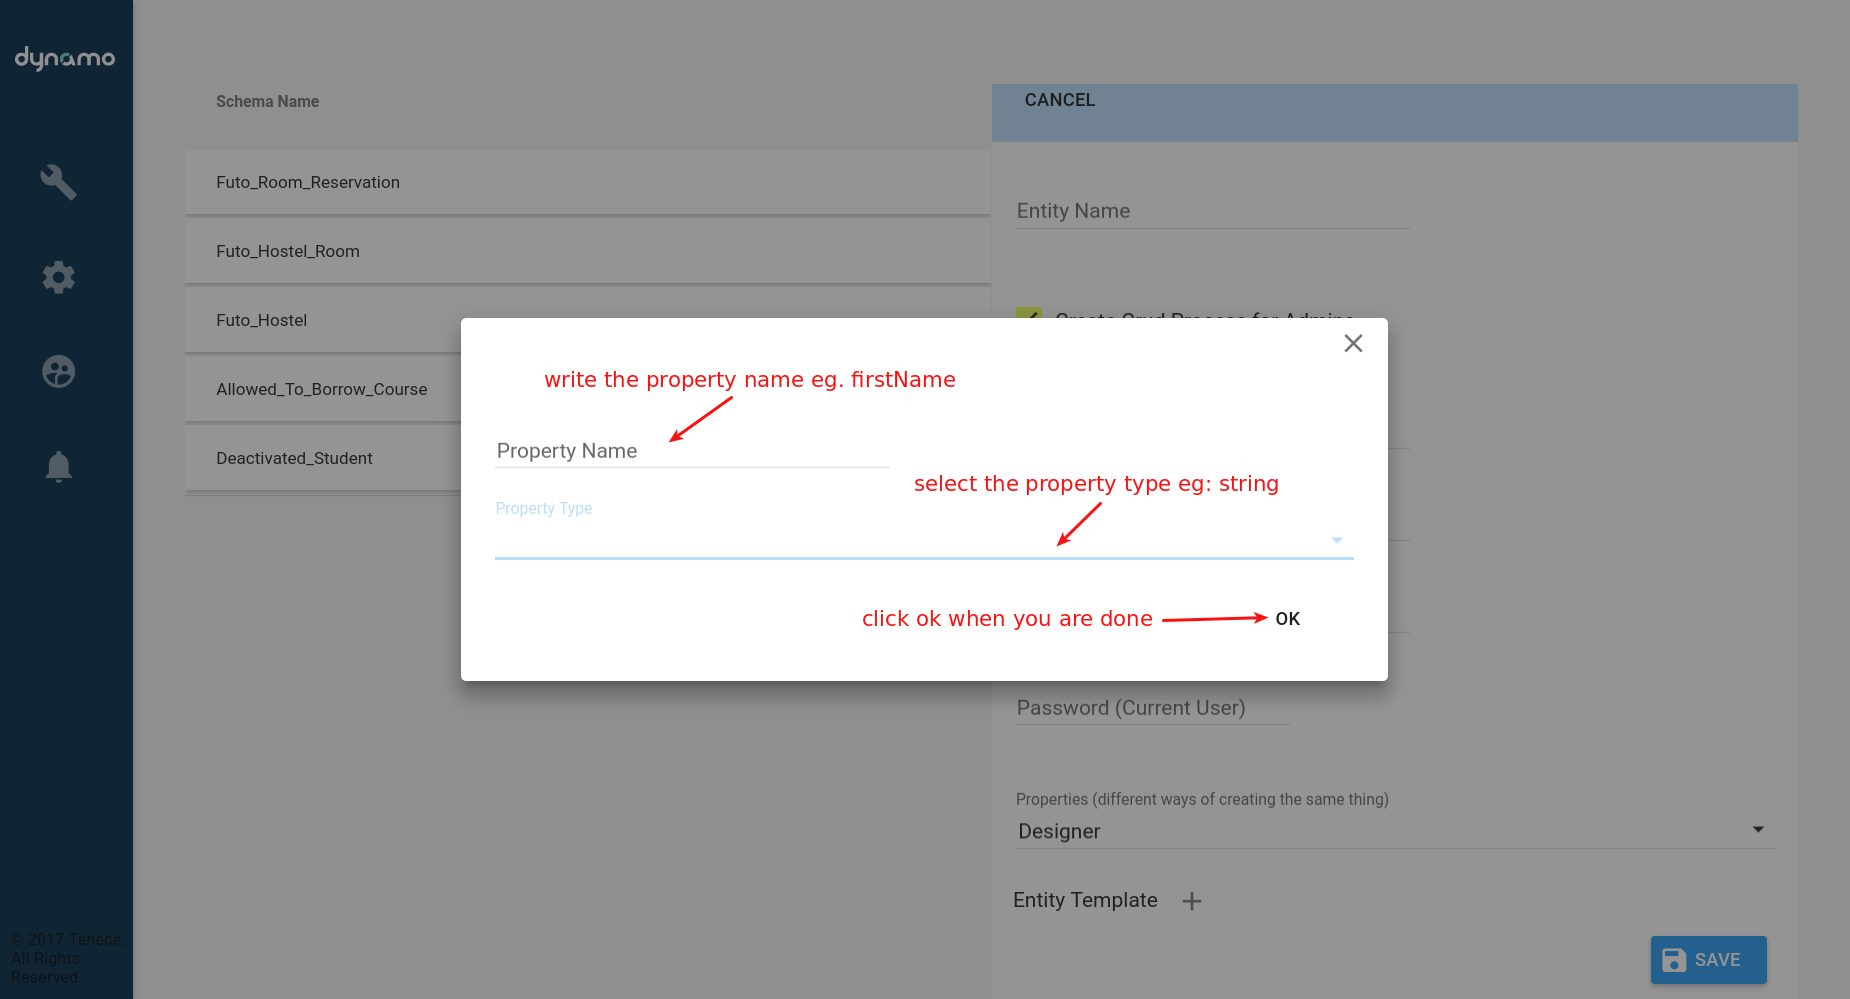
- DESIGNER Method: Select Designer from the properties field and click on the plus sign in front of Entity Template that displayed when you selected Designer.

- In the panel that displays when you click on the plus sign, write the field name in the property name field and select the property identifier/type from the property type field and click on Ok. Note when you click on the Ok button you can click on the plus sign at Entity Template to add more.
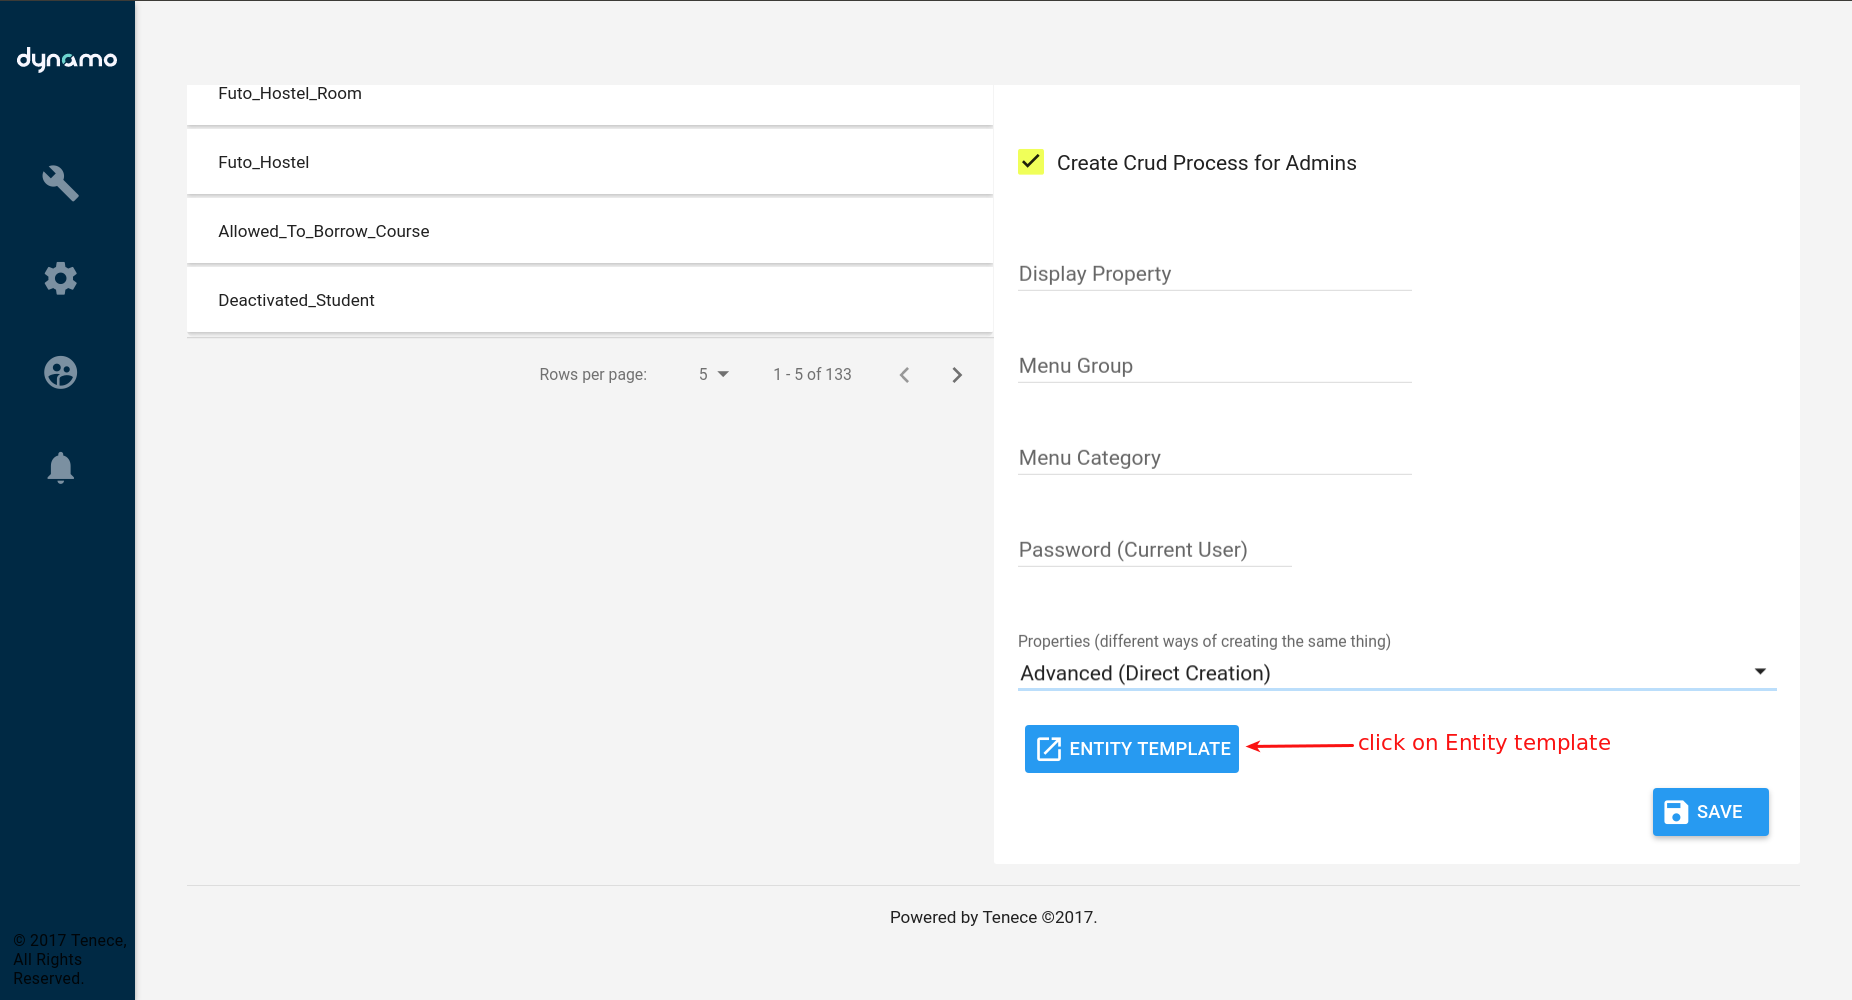
- ADVANCED Method: Select Advanced from the properties field and click on the ENTITY TEMPLATE button.
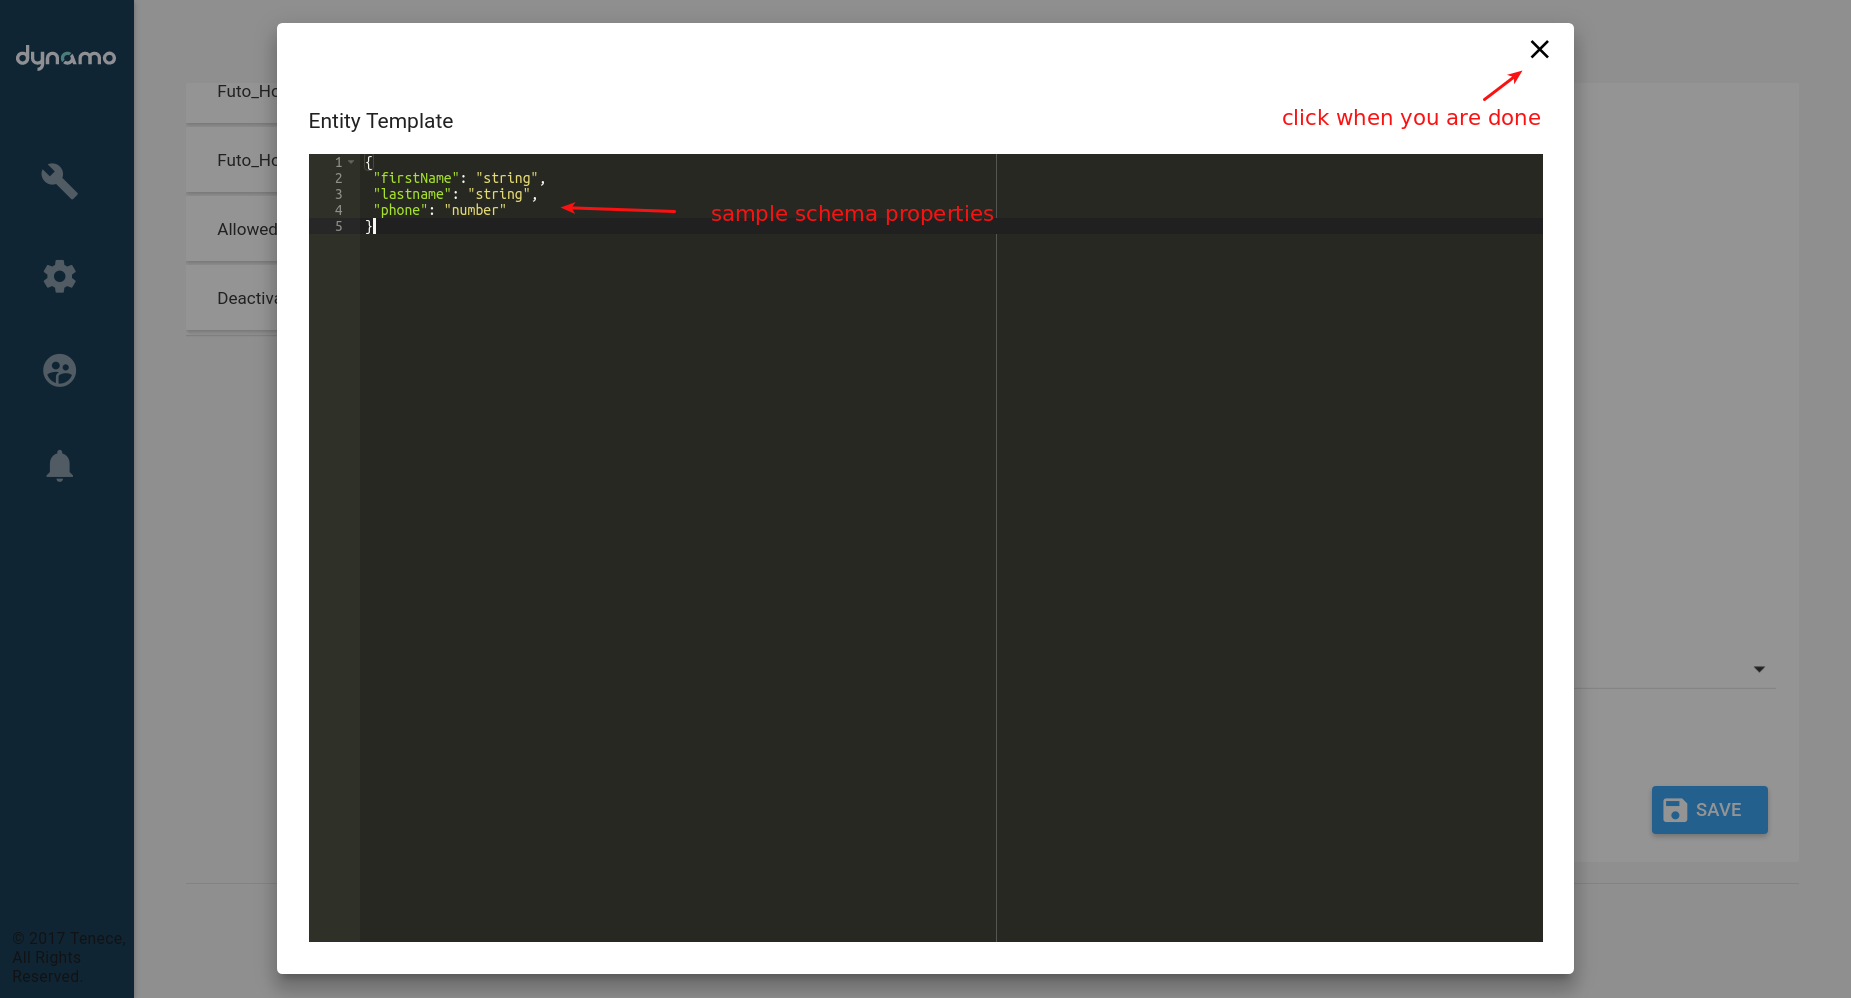
- In the panel that displays there you will write the schema properties. Note you write the schema properties in a JSON format. When you are done click on the exit button at the top right corner of the panel.
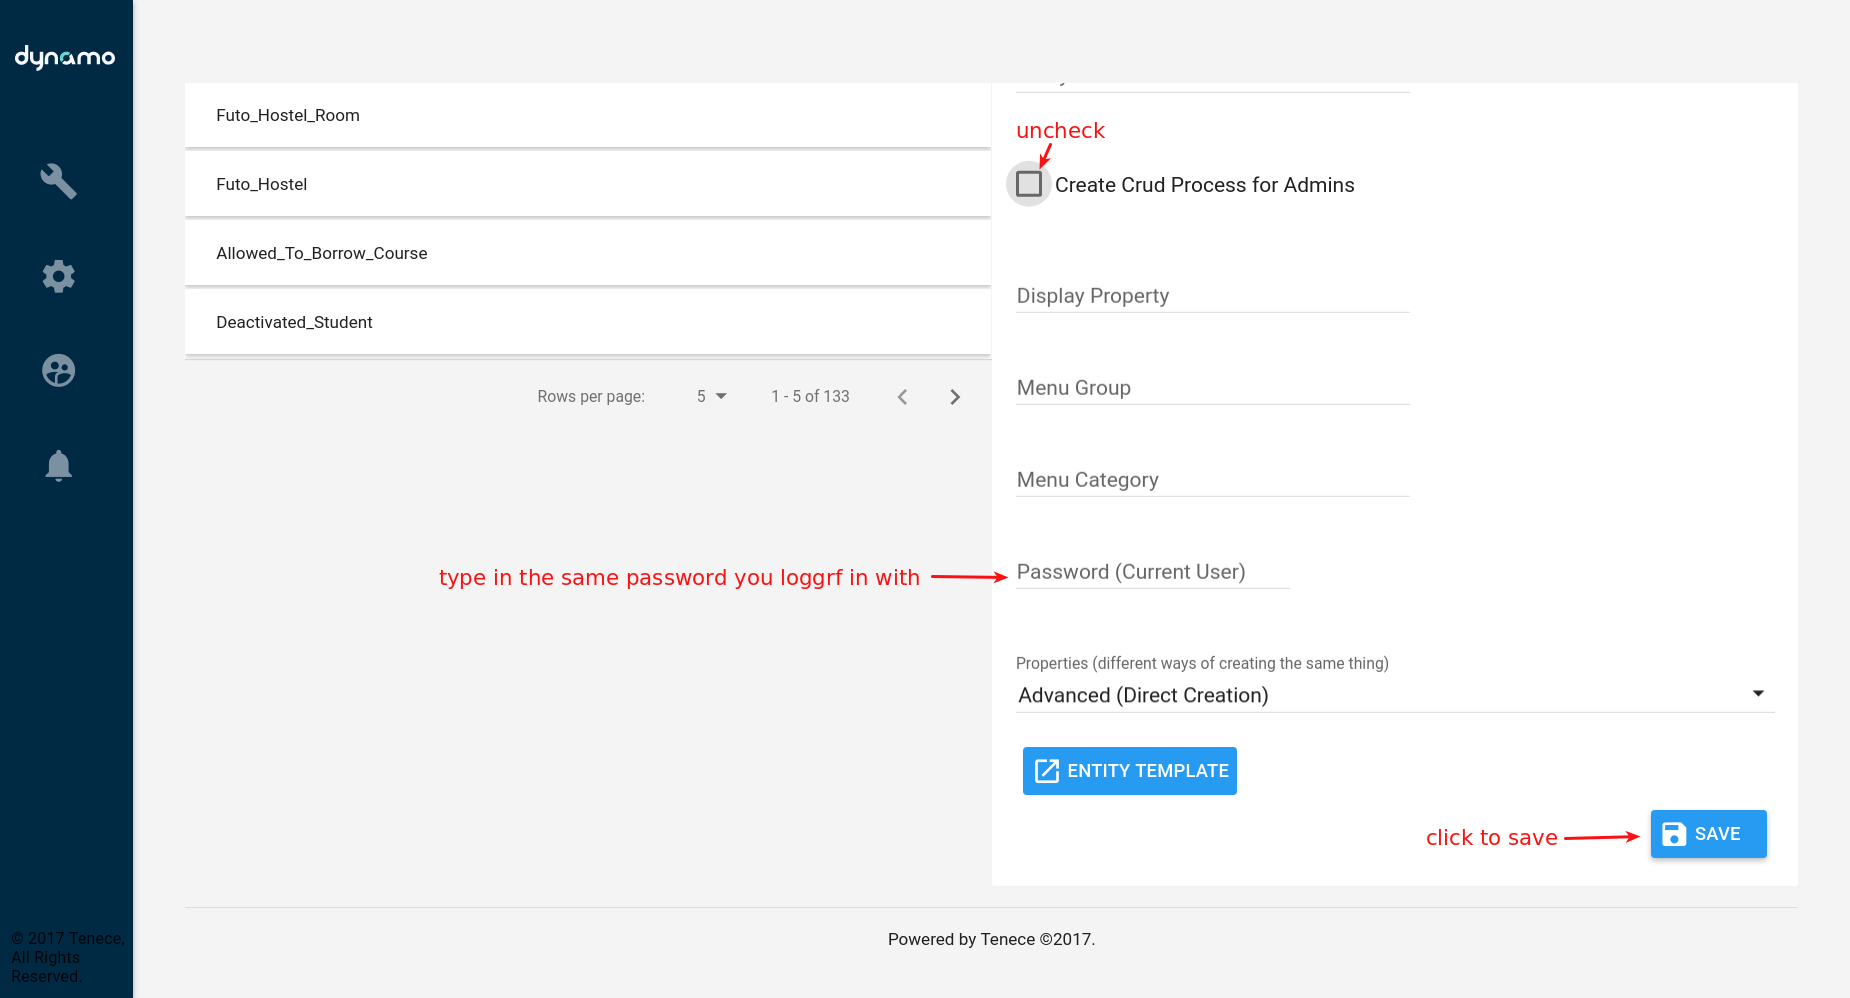
- Finally, when you are through with designing the schema model type in the same password you used to login to the dynamo admin and click save to save the model. Note it will not save if you refresh the page or click on another button without saving what you have worked on or if the schema name already exists or if you did not type in the same password you used to log in.