Setting up a School in Dynamo#
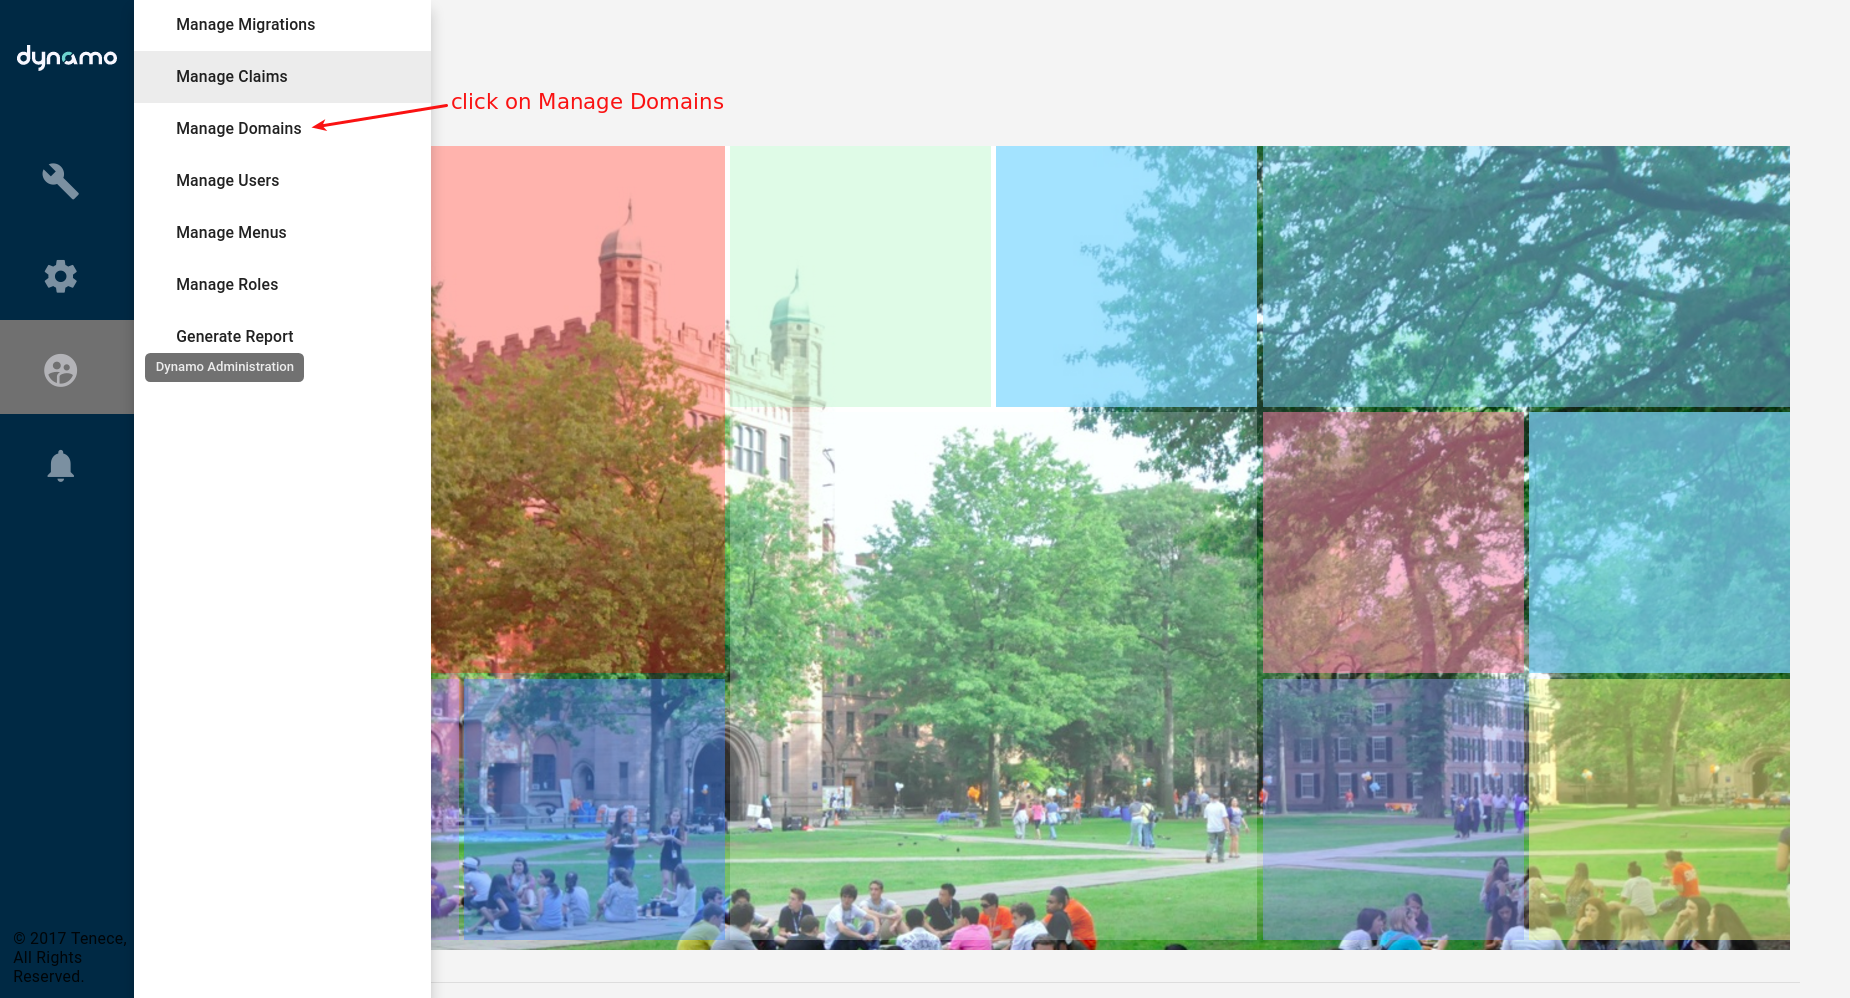
- Login to dynamo admin as an administrator and click on Dynamo Administrator at the left-hand side of the application then click on the Manage Domain.
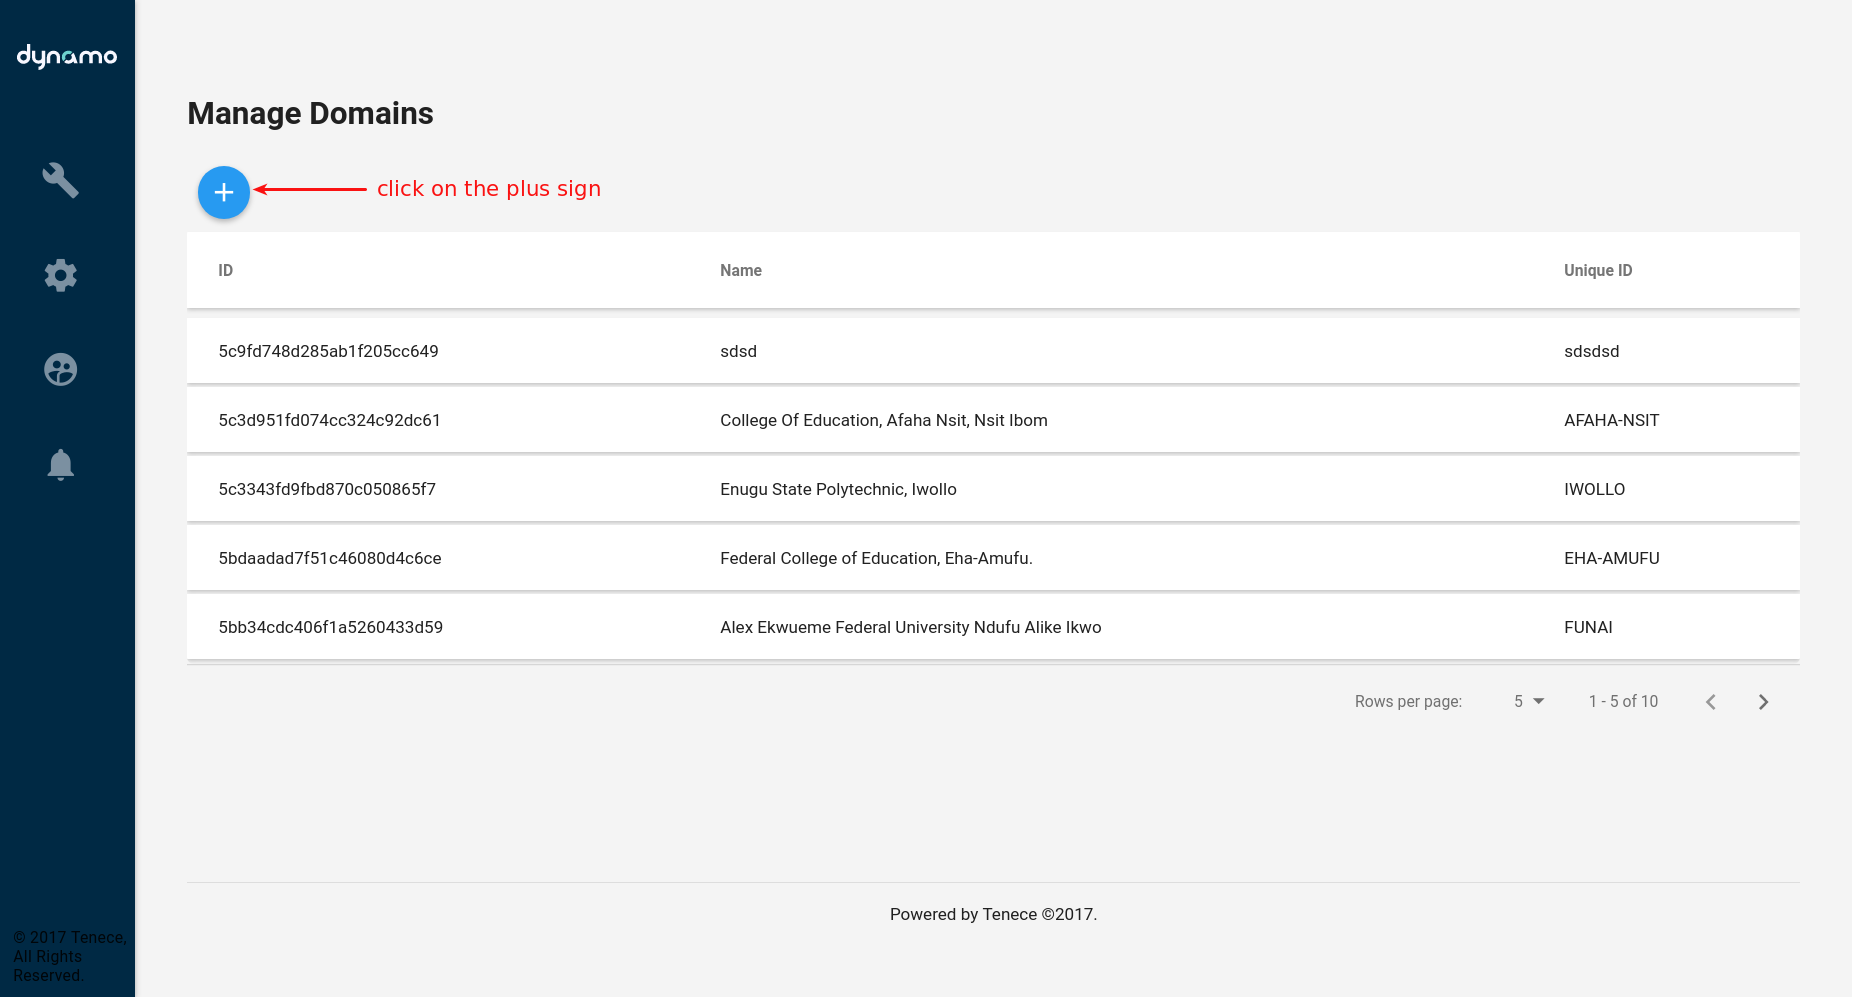
- Click on the plus sign at the left top corner to display a panel where you set up the domain.
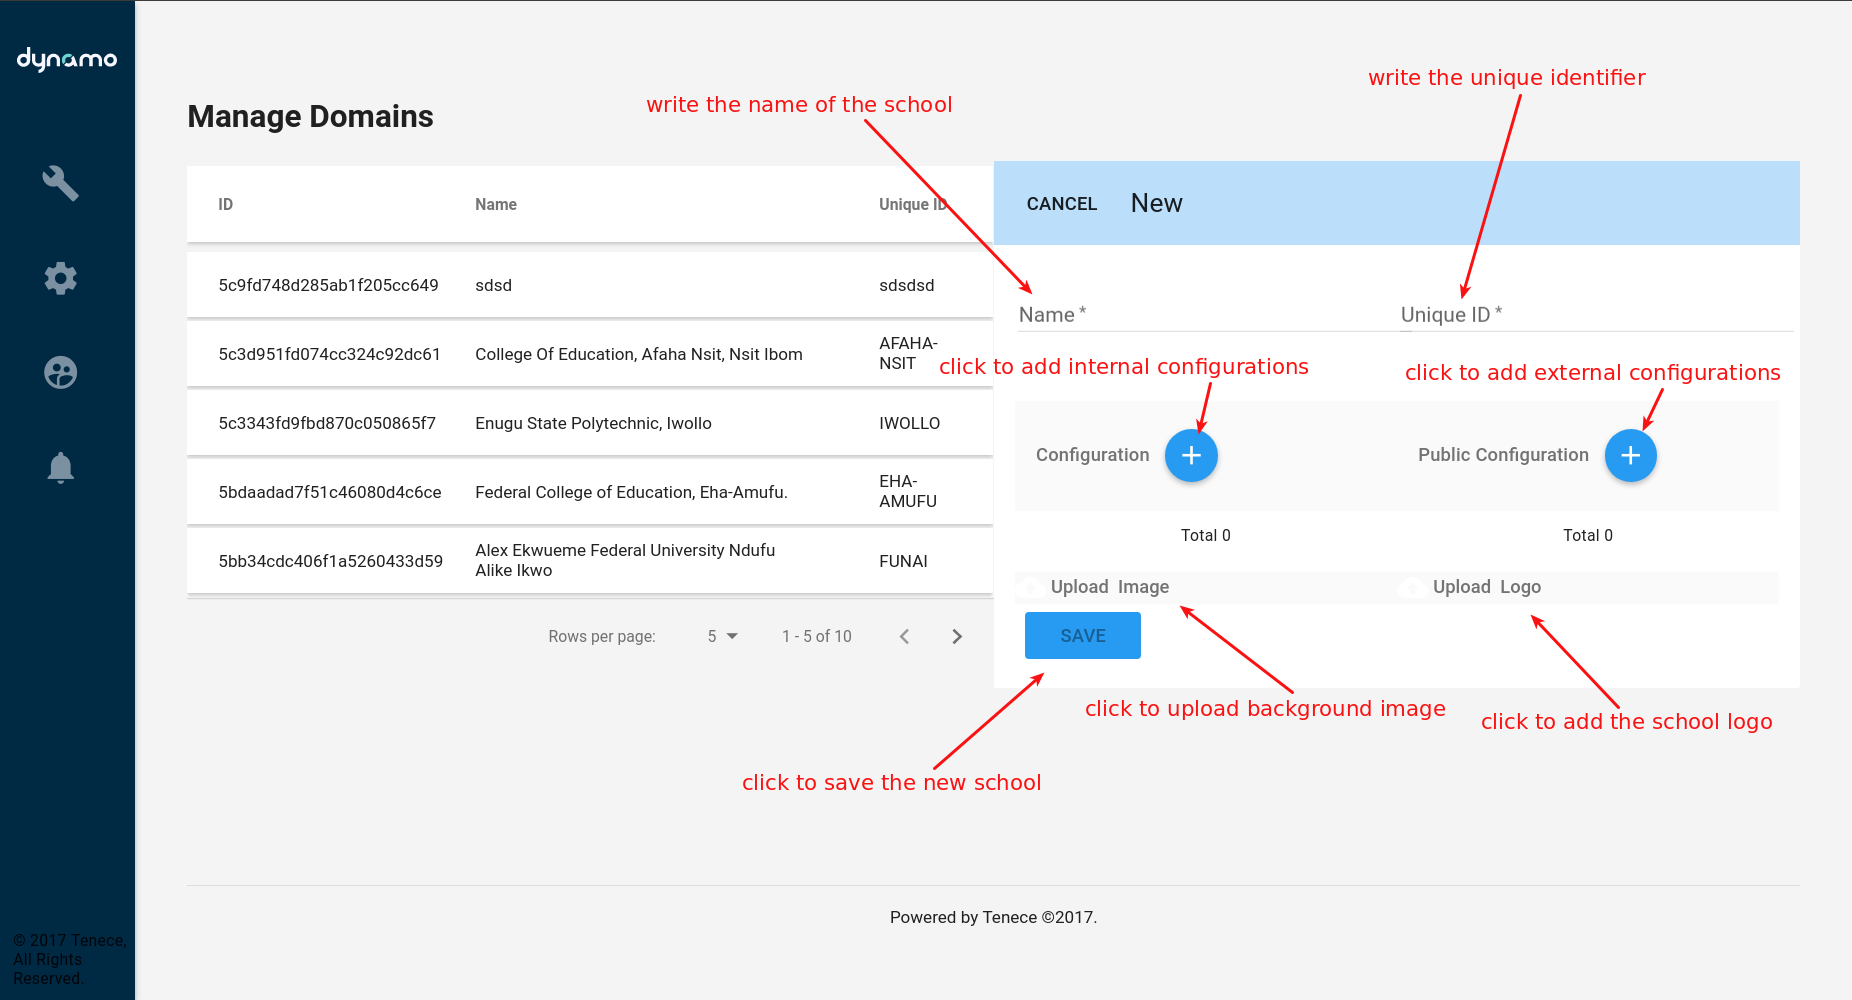
- In the panel write the name of the school in the name field and write the unique identifier in the Unique ID field click on the configuration to add all the internal configurations and for the public configuration click on the public configuration to add all the public configuration eg color. Click on the upload image to upload a background image to the school and click upload logo to upload the school logo. Finally, click on the Save button to create the school.
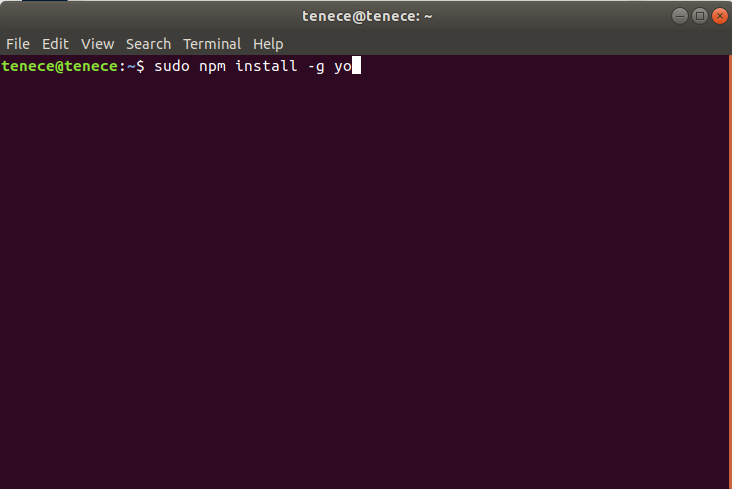
- After creating the school/Domain open your terminal if you are using Unix systems or CMD if you are using Windows systems and Install yeoman-generator globally on your computer. Run npm install -g yo Note: you can use sudo if you are using a Unix system or be an administrator in your CMD.
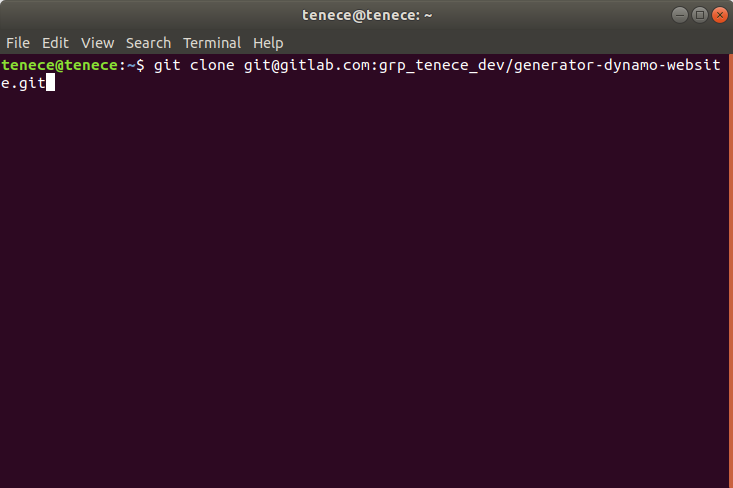
- Then go to GitLab and clone generator-dynamo-website project to your work file in your system.
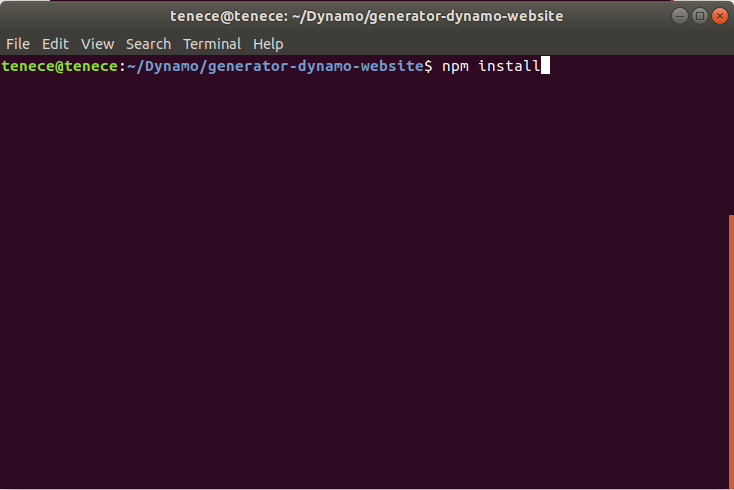
- Navigate into the project file and Run the command npm install inside your version of the cloned repository to install dependencies.
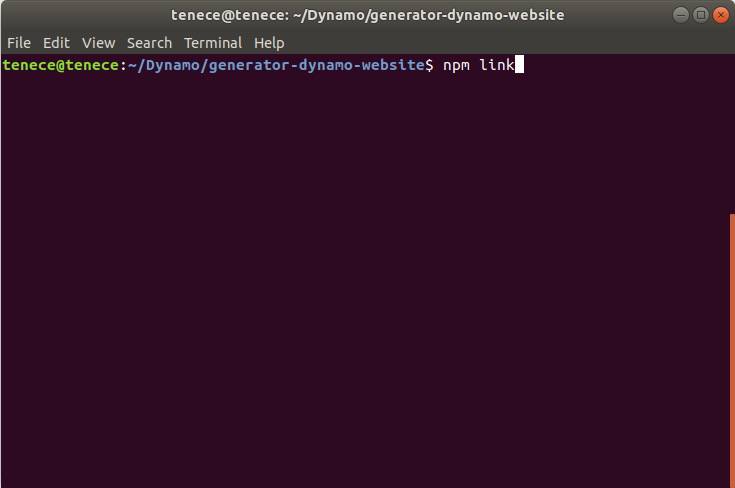
- After running npm install in the cloned repository folder run the command npm link to make the folder globally accessible on your local npm.
- Create a new folder for your new school web application project.
- Open your Terminal or CMD in the new folder created for your new school and Run the command yo dynamo-website in the new folder and provide the answers to the prompt questions. This command scaffolds the project and automatically runs npm install and react-toolbox-theme You can now start the project with npm start.